Record & Share Your Zoom Meetings

Recording Your Zoom Meetings
All VCU Zoom users have the ability to record their meetings on the PC or laptop they use to host them, or to the Zoom Cloud server where they will be kept for 120 days.
Instructors are encouraged to notify their students, either verbally or with a note in the course syllabus, that their classes are being recorded, and that the resulting videos are only intended for educational uses. Keep in mind that recordings that show students could be considered an educational record under the Family Educational Rights and Privacy Act (FERPA) and treat them accordingly, being sure to share them only with your students.
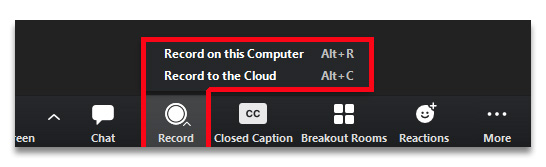
"Record to Computer"
Use this option to save an MP4 file on the device you're using to host the meeting. This could be a PC or laptop, but not a mobile device. As soon as you end the meeting, the file will begin processing; the longer your meeting lasted, the longer it will take to write the file, so it's important to give it time to finish. If you power off your device before the process completes, you may experience issues.
"Record To Cloud"
As the name implies, a "Cloud" recording is saved to Zoom's cloud-based servers rather than your local device. This will always be an either/or decision for the host, as it is not possible to simultaneously record to both destinations.
You can find your Cloud recordings on your Zoom account page under the "Recordings" tab. Keep in mind this link will only persist for 120 days, after which the file will be automatically deleted.
Can't find your Zoom Recordings?
The location of your Zoom recording will depend on whether you chose to "Record to Computer" or "Record to Cloud."
Locally-Saved FIles ("Record to Computer")
Unless you've customized your settings from the default configuration, locally saved files will end up in the default directory:
- Windows: C:\Users\[Username]\Documents\Zoom
- Mac: /Users/[Username]/Documents/Zoom
- Linux: home/[Username]/Documents/Zoom
Each recording will be found in a folder with a name that includes the date and time of the meeting. Depending on your settings, the folder may include one or more video files, an audio file, a TXT file of the transcription, etc.
You can also find locally saved files by logging into your account at vcu.zoom.us and checking the "Recordings" tab under "Computer Recordings." As long as you're on the same device you used to make the recording, Zoom can point you to it.
Cloud-Saved Files ("Record To Cloud")
Your Cloud recordings can be found at vcu.zoom.us under the "Recordings" tab.
Remember that as policy, your Cloud recordings will only exist for 120 days, after which they are automatically deleted. If you want to keep them longer than that, be sure to download them.
If your department has not been placed on the "HIPAA" account*, a copy of your Cloud recording will have been saved to Kaltura (go.vcu.edu/video), where you can find it under "My Media."
*Membership on the HIPAA sub-account is based on a department or business unit’s exposure to HIPAA-governed data and include: the Schools of Medicine, Nursing, Pharmacy, Dentistry and Public Health, the College of Health Professions, the Massey Cancer Center, the VP for Health Sciences, VP for Research, the Department of Psychology and the Partnership for People with Disabilities.
This helpful article in the Zoom Knowledge Base has more information on how to find your recordings.
Zoom offers various features you can use to make your recordings more accessible to viewers who require special accommodations, and bring them into compliance with ADA regulations.
Closed Captions and Transcriptions
If you enable closed captions during your meeting and choose the "Record to Cloud" option, the resulting recording will display closed captions at the bottom of the video and a full transcription to the right of the video. The transcription can be edited for accuracy. It is synchronized with the video during playback and the text is searchable.
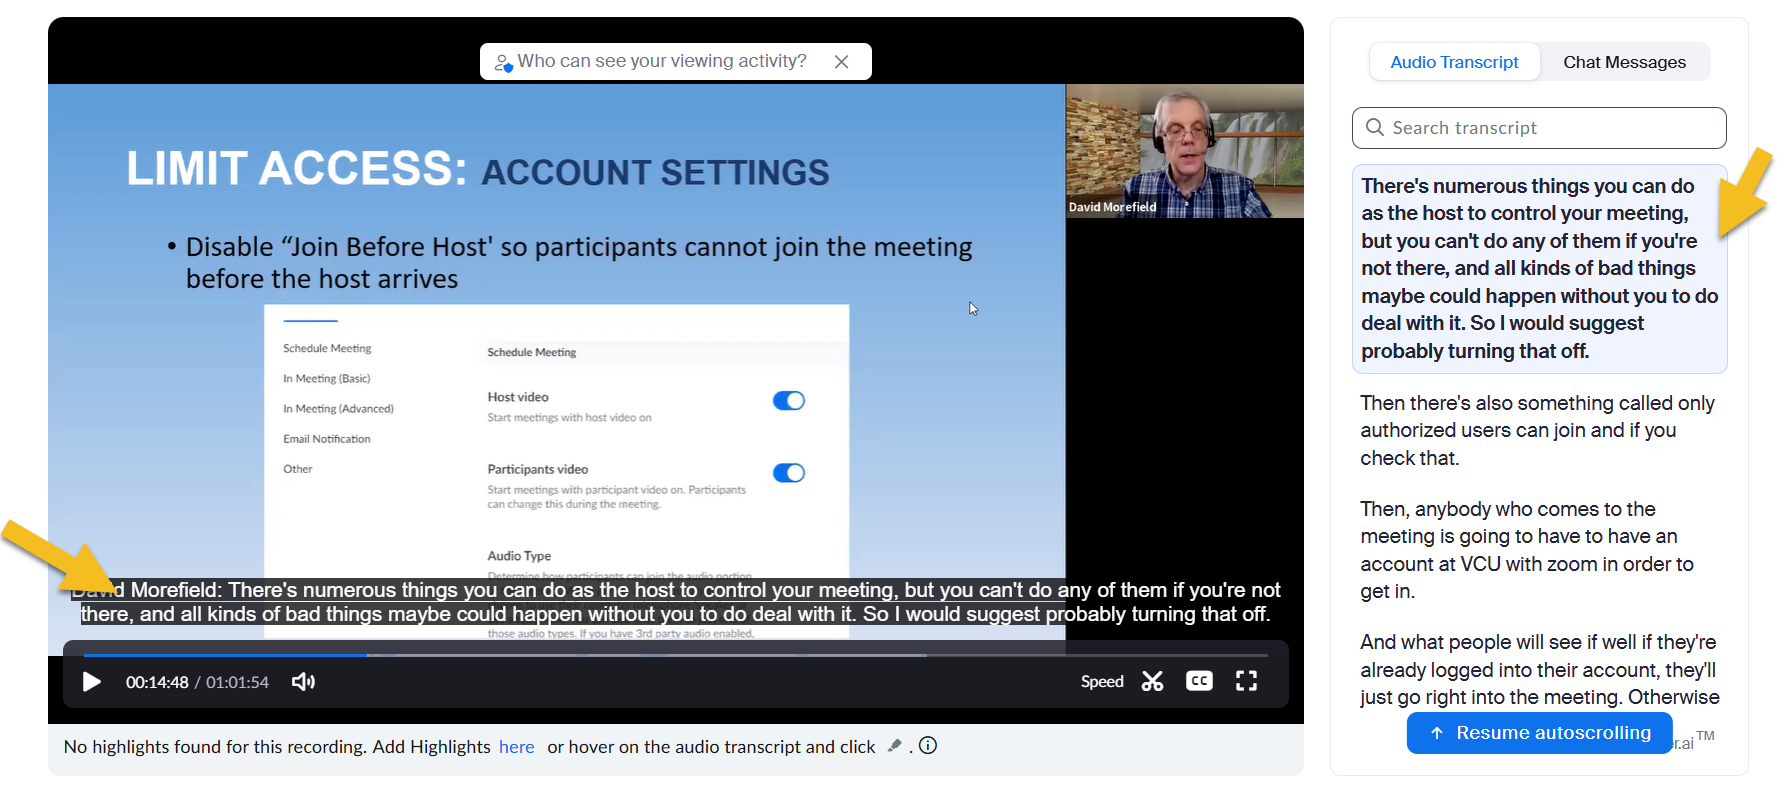
If you're on the "Main" Zoom account, your video will be automatically backed up to VCU's Kaltura server, where Kaltura will generate its own version of the transcript and captions.
How to Share Kaltura Videos
- Go to the VCU Kaltura page (go.vcu.edu/video)
- Click on the desired video to access its settings.
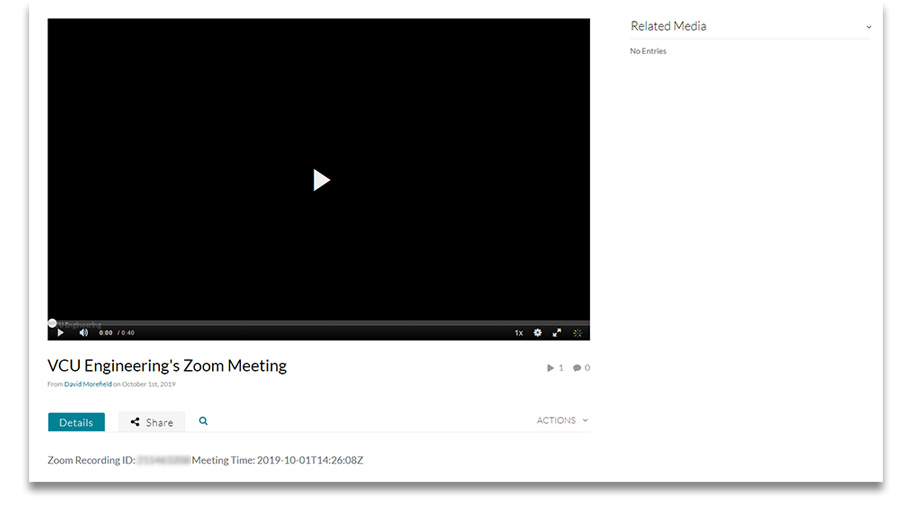
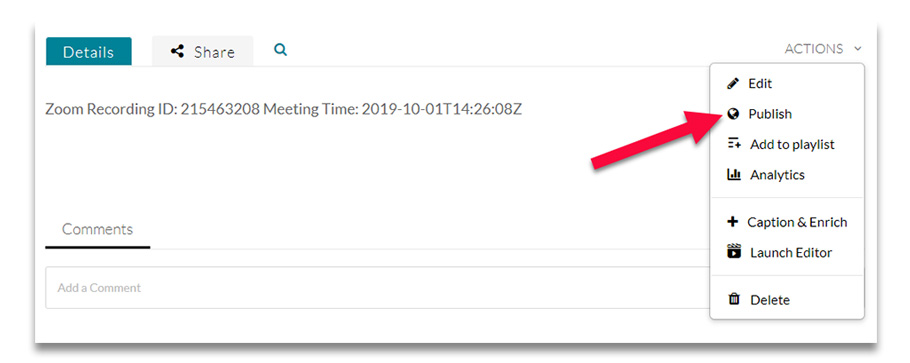
- Using the "Action" pull-down menu, choose "Publish."
- When your video loads to Kaltura, the Publishing level defaults to "Private," which means only you as the owner can access the video. Change this to "Unlisted" to allow viewing by persons you share the link with. Or change it to "Published" if you want the video to show up in keyword searches. (If you choose this option, you'll need to choose a couple of keywords to assist users when they search).
When you've made your choice, press "save".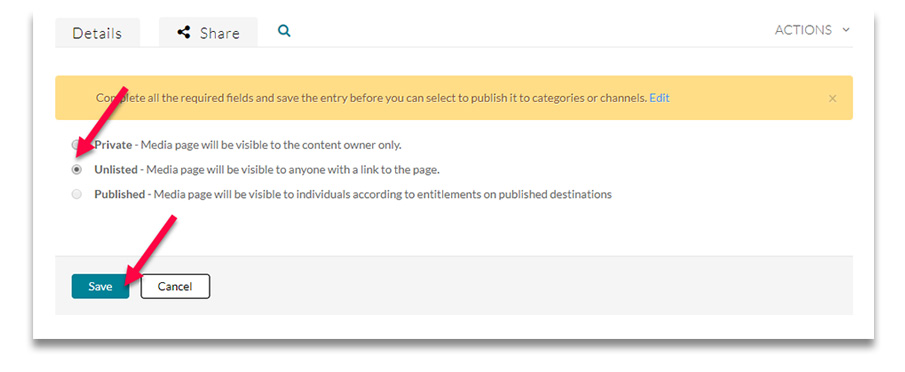
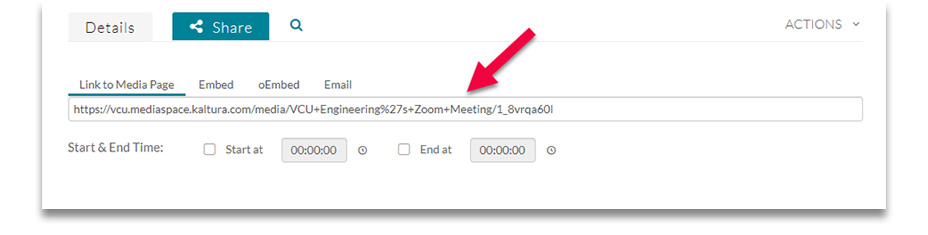
- Once this is done, go to the "Sharing" tab to get a URL you can share with your audience via e-mail, webpage or other methods. Or choose "embed" to get the code you need to insert your video directly into an HTML page
Manually Upload Zoom Videos to Kaltura
For those users on the HIPAA sub-account who will not have access to Cloud Recording, it's still possible to host and share your videos from Kaltura.
IMPORTANT: If your recording includes PHI or other HIPAA-regulated content, DO NOT upload it to Kaltura as it is not compliant with HIPAA security standards.
Follow these steps to use Kaltura when appropriate:
- Record or download your file to your computer.
- Visit go.vcu.edu/video to access your Kaltura account.
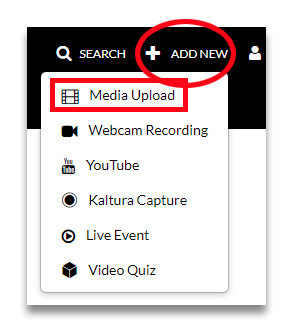
- Choose "Add New" from the top menu, select "Media Upload" and point to the file you want to upload.
- Follow the steps in the previous section (above), "Share Kaltura Videos".
Transcribe Your Meetings
You can generate editable transcriptions of your Zoom meetings via the "Cloud Recording" feature. To do so, follow these steps:
- Log into your account page at vcu.zoom.us
- Go to "Settings > Recording > Cloud Recording"
- Under "Advanced Cloud Recording Settings," check the box for " Create audio transcript"
With your meeting in progress, use the "Record to Cloud" option. At the completion of your meeting, you will find the recording and transcript on your account page under the "Recordings" tab. When you view the recording online, the transcript will display in a side window. You can edit it there and/or download it to your computer to edit, store or share.
"HIPAA" account members please note: Your transcriptions will be linked to your recordings and like the videos, they will be deleted after 60 days, so be sure to download them if you need to retain them for a longer period.