Record & Share Your Zoom Meetings

Recording Your Zoom Meetings
Instructors are encouraged to notify their students, either verbally or with a note in the course syllabus, that their classes are being recorded, and that the resulting videos are only intended for educational uses. Keep in mind that recordings that show students could be considered an educational record under the Family Educational Rights and Privacy Act (FERPA) and treat them accordingly, being sure to share them only with your students.
All VCU Zoom users have the ability to record their meetings on the PC or laptop they use to host them, or to the Zoom Cloud server where they will be kept for 120 days.
PLEASE NOTE:
Zoom Cloud recordings are stored online for 120 days, at the end of which they are automatically deleted.
Users on the “Main” account will have their meetings automatically backed up to Kaltura for long-term storage and sharing. Users on the “HIPAA” sub-account will not have this option as Kaltura is not HIPAA compliant. If these users wish to retain a copy of their recordings for longer than 120 days, they will need to download the files from the Zoom Cloud server prior to their automatic deletion.
Membership on the HIPAA sub-account is based on a department or business unit’s exposure to HIPAA-governed data and include: the Schools of Medicine, Nursing, Pharmacy, Dentistry and Public Health, the College of Health Professions, the Massey Cancer Center, the VP for Health Sciences, VP for Research, the Department of Psychology and the Partnership for People with Disabilities.
How to Use "Local" Recording
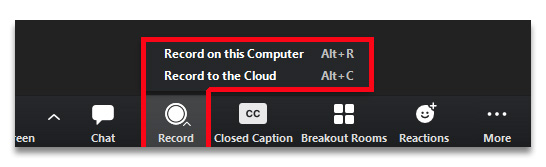
A "local" recording is one that's saved to the device hosting your meeting. This could be a PC or laptop, but not a mobile device. Choose "Record to this Computer" and an MP4 video file will be saved to your hard drive. As soon as you end the meeting, the file will begin processing; the longer your meeting lasted, the longer it will take to write the file, so it's important to give it time to finish. If you power off your device before the process completes, you may experience issues (see note below).
When the file is complete, a window will appear directing you to its location, but if you need to look for it later, the default location will be "C:\users\[your eID]\Documents\Zoom", in a folder labeled with the meeting date and time. You should also be able to find your recordings on your account page (vcu.zoom.us) under "Recordings > Computer Recordings," as long as you're visiting the webpage using the same device you recorded with.
PLEASE NOTE:
If your computer loses power or experiences other system failures before your recording is done processing, you may need to recover your video using this process:
- Conduct a search for files labeled "double_click_to_convert_01" and "double_click_to_convert_02"
- relocate the files to a folder that contains no other files
- double-click on the file that ends in "_01." This will relaunch the process required to compile your video.
How to Use Cloud Recording
As the name implies, a "Cloud" recording is saved to Zoom's cloud-based servers rather than your local device. This will always be an either/or decision for the host, as it is not possible to simultaneously record to both destinations.
With a meeting in progress, click on the "Record" button and select the "Record to the Cloud" option.
At the conclusion of the meeting, you can find your recording on your Zoom account page under the "Recordings" tab. Keep in mind this link will only persist for 120 days, after which the file will be automatically deleted.
Unless your department is assigned to the “HIPAA” sub-account, your recording will be backed up to VCU Kaltura where you can find it under "My Media." There may be a delay while the video is transferred and processed, so please be patient.
If you are assigned to the HIPAA account, no backup will be delivered to Kaltura. If you want to retain your recording for longer than 120 days, it will be necessary to download it to your computer for local storage of delivery to a secure server. If the meeting content does not include HIPAA-regulated data, you can manually upload the file to Kaltura for long term storage and sharing.
How to Share Kaltura Videos
- Go to the VCU Kaltura page (go.vcu.edu/video)
- Click on the desired video to access its settings.

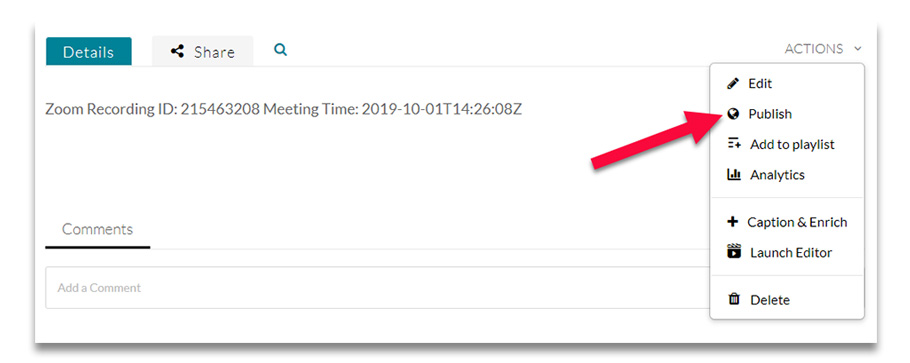
- Using the "Action" pull-down menu, choose "Publish."
- When your video loads to Kaltura, the Publishing level defaults to "Private," which means only you as the owner can access the video. Change this to "Unlisted" to allow viewing by persons you share the link with. Or change it to "Published" if you want the video to show up in keyword searches. (If you choose this option, you'll need to choose a couple of keywords to assist users when they search).
When you've made your choice, press "save".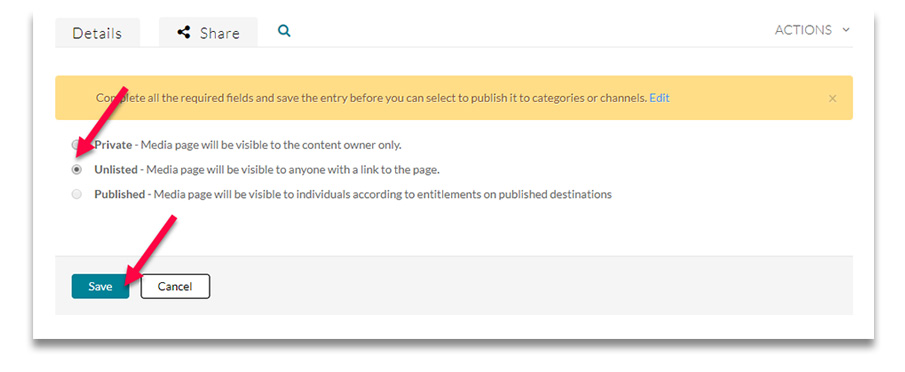
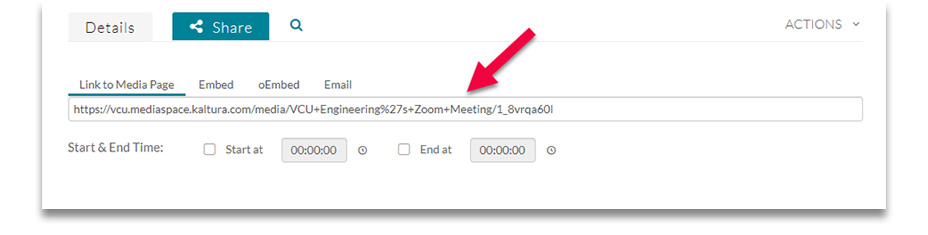
- Once this is done, go to the "Sharing" tab to get a URL you can share with your audience via e-mail, webpage or other methods. Or choose "embed" to get the code you need to insert your video directly into an HTML page
Manually Upload Zoom Videos to Kaltura
For those users on the HIPAA sub-account who will not have access to Cloud Recording, it's still possible to host and share your videos from Kaltura.
IMPORTANT: If your recording includes PHI or other HIPAA-regulated content, DO NOT upload it to Kaltura as it is not compliant with HIPAA security standards.
Follow these steps to use Kaltura when appropriate:
- Record or download your file to your computer.
- Visit go.vcu.edu/video to access your Kaltura account.
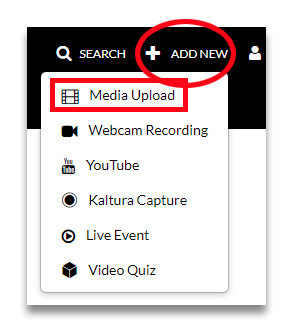
- Choose "Add New" from the top menu, select "Media Upload" and point to the file you want to upload.
- Follow the steps in the previous section (above), "Share Kaltura Videos".
Can't find your Zoom Recordings?
The location of your Zoom recording will depend on whether you chose to "Record to Computer" or "Record to Cloud."
"Record To Computer"
The first choice saves the file to your local hard drive. Unless you've customized your settings to send them elsewhere, the files will be placed in the default directory:
- Windows: C:\Users\[Username]\Documents\Zoom
- Mac: /Users/[Username]/Documents/Zoom
- Linux: home/[Username]/Documents/Zoom
Each recording will be found in a folder with a name that includes the date and time of the meeting. Depending on your settings, the folder may include one or more video files, an audio file, a TXT file with the transcript, etc.
If you're still on the device you used to record your meeting, you may also log into your account at vcu.zoom.us and go to the "Recordings" (or "Recordings and Transcripts") tab, then click on "Computer Recordings." Zoom will scan your device and provide a list of all the recordings saved to it. Find the one you want and click "Open."
"Record To Cloud"
If you chose to record to the Cloud, log in at vcu.zoom.us and go to "Recordings" to view, share or download your files.
Remember that as policy, your Cloud recordings will only exist for 120 days, after which they are automatically deleted. If you want to keep them longer than that, be sure to download them.
If your department has not been placed on the "HIPAA" account*, a copy of your Cloud recording will have been saved to Kaltura (go.vcu.edu/video), where you can find it under "My Media."
*Membership on the HIPAA sub-account is based on a department or business unit’s exposure to HIPAA-governed data and include: the Schools of Medicine, Nursing, Pharmacy, Dentistry and Public Health, the College of Health Professions, the Massey Cancer Center, the VP for Health Sciences, VP for Research, the Department of Psychology and the Partnership for People with Disabilities.
This helpful article in the Zoom Knowledge Base has more information on how to find your recordings.
Zoom offers various features you can use to make your recordings more accessible to viewers who require special accommodations, and bring them into compliance with ADA regulations.
Closed Captions and Transcriptions
If you enable closed captions during your meeting and choose the "Record to Cloud" option, the resulting recording will display closed captions at the bottom of the video and a full transcription to the right of the video. The transcription can be edited for accuracy. It is synchronized with the video during playback and the text is searchable.

If you're on the "Main" Zoom account, your video will be automatically backed up to VCU's Kaltura server, where Kaltura will generate its own version of the transcript and captions. If you prefer to use Zoom's version, follow these steps:
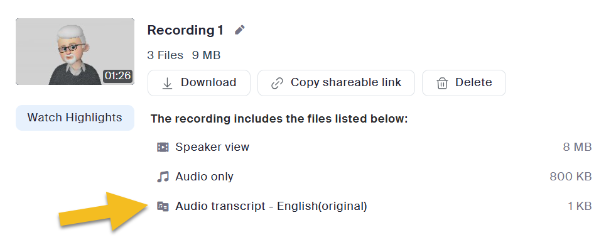
1. Download the audio transcript from Zoom Cloud.
2. Log into your Kaltura account at go.vcu.edu/video and find your recording under "My Media"
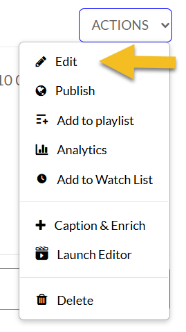
3. Open your file and choose "Actions > Edit"
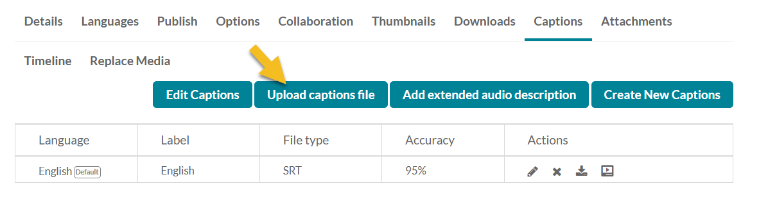
4. Go to the "Captions" tab. The default Kaltura caption file will be the only option listed. Click on "Upload Captions File" and upload the transcript you downloaded from Zoom Cloud in Step 1.
Once the file is loaded, Kaltura will treat it as the Default option. If you prefer to go back to the Kaltura transcript as the default, you can.
If you are on the HIPAA account, your recordings will not be automatically backed up to Kaltura, but you can upload them manually as explained elsewhere on this page. Once uploaded, follow the above steps to replace the Kaltura captions with the Zoom version using the above instructions.
"Extended Audio Description"
Persons who are visually impaired may require additional accommodations in order to get the most out of your videos. With an Extended Audio Description, you can add text-based descriptions to explain information that would otherwise be conveyed only with images. Descriptive text is recommended for any sequences where images display without audio, or where the existing audio is insufficient to explain what's being seen on screen.
For example, if your video includes a clip of a sunset, you'll want to add a description like, "The sun is setting on the horizon." With Extended Audio Description enabled, the video will pause, the descriptive text will appear on screen and a voice will read the text aloud. Viewers who choose not to enable Extended Audio Description will experience the video without interruption.
This feature can be applied to videos using these instructions:
1. Open a new file in an app like Notepad or Word. At the top of the document type: "WEBVTT" (without the quote marks)
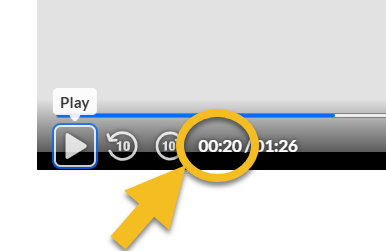
2. In Kaltura, start playing your video and watch the time code that displays beneath it. The code counts off the minutes and seconds in your file (ex: 00:20 = zero minutes, twenty seconds) and the numbers advance as the video plays.
3. When you get to a spot in the timeline that requires description, pause playback and make a note of the timecode.
4. Go back to the text file you've created. Space down twice from "WEBVTT" and add the time code to tell the video where to pause, then enter your descriptive text as you'd like it to be seen and heard. For example if your first description needs to appear 20 seconds into the video, use this format:
1
00:00:20.000 --> 00:00:22.000
The sun is setting on the horizon.
The "1" indicates this is the first time you need the video to pause. Use "2" for the next entry, and so on down the page, leaving a space between each entry. So an Extended Audio Description file with 2 descriptions might look like this:
WEBVTT
1
00:00:20.000 --> 00:00:22.000
The sun is setting on the horizon.
2
00:00:28.000 --> 00:00:30.000
A flag is waving in the breeze. The clouds are orange and purple.
Please note that even though Kaltura will only show you seconds, the code needs to entered with more information. In the example above, the first pair of digits represent hours, the next pair is minutes, then seconds, then three digits to represent frames. So if Kaltura says "00:20" to represent zero minutes, 20 seconds, you'll need to enter it here as "00:00:20:000" representing zero hours, zero minutes, 20 seconds and zero frames. It has to be formatted this way in order to work.
Also note that the first bit of timecode tells the video when to pause, so it needs to be accurate. The second timecode doesn't need such precision and it's up to you what to enter, but whatever number you choose needs to be later in the timeline than the first.
5. Keep repeating the above process: watch the video, pause it whenever you need a description, type the time code into the document you're creating and add the text you want to be seen and heard. Repeat until done.
6. When you're done, save the document as a text file with the extension ".vtt" and make sure the encoding method is "UTF-8."
7. In Kaltura, go to your video, choose "Edit" and then choose "Add Extended Audio Description."
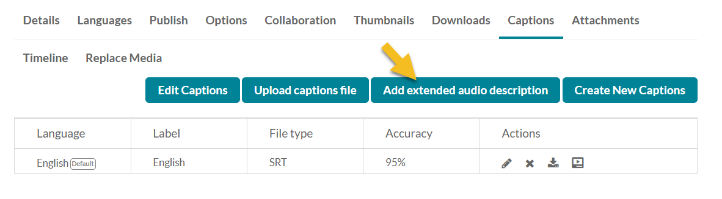
Now, in addition to the closed caption option, viewers may choose to access the audio description by clicking on the "AD" icon in the player window. The video will stop at the times you've indicated, the text will display and an automated voice will read the text aloud.
The Kaltura Knowledge Base provides an example of this feature in action.
Transcribe Your Meetings
You can generate editable transcriptions of your Zoom meetings via the "Cloud Recording" feature. To do so, follow these steps:
- Log into your account page at vcu.zoom.us
- Go to "Settings > Recording > Cloud Recording"
- Under "Advanced Cloud Recording Settings," check the box for " Create audio transcript"
With your meeting in progress, use the "Record to Cloud" option. At the completion of your meeting, you will find the recording and transcript on your account page under the "Recordings" tab. When you view the recording online, the transcript will display in a side window. You can edit it there and/or download it to your computer to edit, store or share.
"HIPAA" account members please note: Your transcriptions will be linked to your recordings and like the videos, they will be deleted after 60 days, so be sure to download them if you need to retain them for a longer period.