Zoom Do's And Don'ts

If you’ve ever been in a Zoom meeting, you already know there can be huge differences in video and audio quality from one participant to the next, as well as there being some folks who are just more fun to interact with than others. Merely having the app, a webcam and a mic is enough to get you going with Zoom but looking and sounding your best can involve a bit more effort, and a good grasp of Zoom etiquette can take you far.
Here, then, are a few tips to help you get the most out of Zoom.
Do...
When it's time to host or join a Zoom meeting, find a spot which is not only comfortable but also relatively quiet and well-lit. Avoid noisy crowds or traffic sounds, fans or machine motors. Be sure to turn off background music and the TV. If a quiet location is not an option, be considerate and mute your microphone until it's time to speak up.
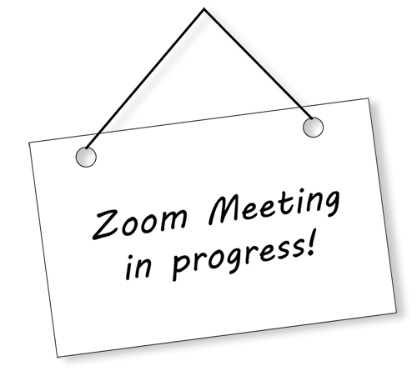
If you share your home with others, consider hanging a sign outside your space asking for quiet while your meeting is in progress.
Even in a quiet space, the distance between you and that microphone built into your webcam or laptop can introduce noise you don’t want; the sound of your fingers tapping on the keyboard or drumming on your desktop, the rustling of papers or a noisy air conditioner. The microphones built into webcams and laptops can also tend to have a “tinny” quality, like you’re talking from inside a metal box.
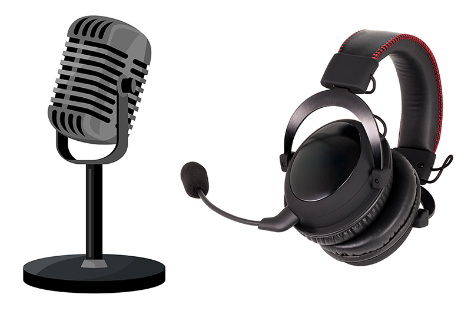
A USB mic will give you much better results, and many good quality models can be found cheaply online. You might even consider using a headset/microphone combo: they’re designed to filter out background noises in favor of your voice, and the earpieces will help you concentrate on incoming audio, as well as keeping persons around you from having to hear your meetings. Depending on the design of the headset, you may need to move the microphone up above the tip of your nose or off to one side of your mouth to cut down on breath noises and prevent your audio from overdriving.
The average webcam doesn’t handle dark images well, so set yourself up in a location with adequate lighting.
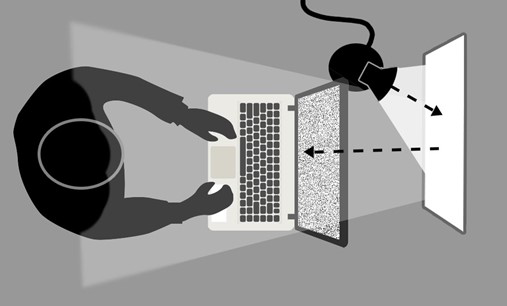
Windows are a great source of natural light, but not if they’re behind you; all that light pouring into the lens will reduce you to a mere silhouette for other participants. Instead, turn yourself more towards the window and let the sunlight illuminate your face. A thin curtain can mitigate the harshness of direct sunlight.
Alternatively, you can place a lamp behind your PC or laptop to provide illumination. Be sure to use a shade to soften the light, both for the sake of your eyes and also to avoid looking “washed out.” If you have a directional lamp, point it away from you and set up a white sheet of paper or poster board to “bounce” the light back at yourself. This will cut down on glare and spread out the light for a more pleasing look.
No one looks good in an “up the nose” shot, so try to set your camera at eye level.
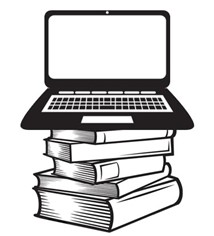
If your webcam sits on top of your PC monitor, you may be in good shape already, but you have the freedom to set it on a higher object if it helps. If you’re using the camera that was installed in your laptop, it may be too low in relation to your face. Try setting the laptop on a stack of books or similar objects to raise it up.
If you plan to show slides or share other content, keep in mind this elevation could make it more awkward to use the keyboard. Consider using a mouse to advance your slides instead of the built-in trackpad.
Be aware of your background when you're on camera. Make sure your environment is tidy, uncomplicated and non-distracting. Be mindful of glass or polished surfaces that might reflect your laptop screen. If there are windows behind you, make sure the light coming from them doesn’t create “streaks” across your camera lens. Keep in mind some locations may reveal more about your living space than you want to share with the world. You can always arrange things like books or plants to create a sort of "set" to perform from, but in many cases it might be easiest just to keep a bare wall behind you.
If you’re using a shared space, try to avoid locations where others might wander into camera view, and be sure to give your housemates fair warning that you’ll be “on the air” for a while.
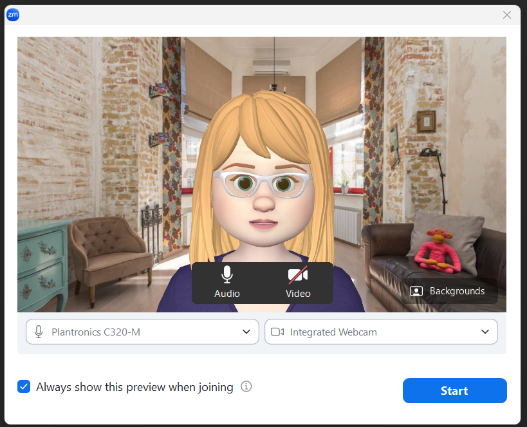
The newest versions of Zoom will always prompt you to check your camera image before starting or joining a meeting. Use this opportunity to double-check your appearance and that of your surroundings before letting the whole world peek in. Take a moment to straighten your hair and clothes, remove objects you don’t want in the shot, etc.
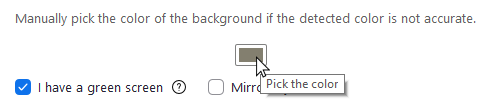
If you don't want to share what your actual surroundings look like, Zoom has a cool “Virtual Backgrounds” feature that lets you place yourself pretty much anywhere. However, depending on your computer, this feature may or may not be helpful. You'll need a decent processor and graphics card to use virtual backgrounds without having an actual, physical greenscreen, and even then, you may find the effect unconvincing or distracting. Stack the deck in your favor by starting with a blank wall behind you, so Zoom has less work to do.
If you have an actual greenscreen, you should see better results. Set the screen far enough behind you to avoid shadows and check the “I have a green screen” box under your “Virtual Background” settings. Your background doesn’t necessarily have to be green – you can choose any color you want removed -- but since green is not a “human” color, removing it is less likely to erase things you want to keep, like parts of your face or body.
Also, keep in mind that virtual backgrounds can work against you as well as for you. They're not all created equal; some can be ugly and garish, filled with distracting details or text or maybe just inappropriate for a work/school setting. You can build your own library of backgrounds to use in different situations, but remember the last background you used will be the one pre-loaded for your next meeting, and you might not want to appear in the Batcave or Hogwarts for that talk with the boss.
Check the virtual backgrounds page for more information, including a library of approved VCU-themed backgrounds.
Technological advances may have made it possible for us to show up for meetings in our pajama pants, but even Zoom has some standards to consider.
Generally speaking, cameras favor solid colored fabrics over intricate patterns, where your movements may cause strange visual effects that could be hard on the eyes or distract from your message. Brighter colors are often the best, but keep in mind that pure white may be too much for your camera to deal with, depending on your lighting situation.
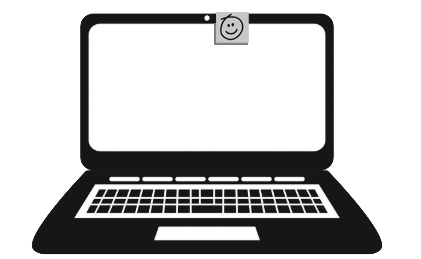
Zoom fatigue gets to all of us, but try to avoid the temptation of multitasking in meetings. Your meeting participants can tell when you're distracted by email or other tasks, and they appreciate it when you keep up eye contact.
In particular, you'll want to keep looking into the camera when you have the floor to make an important presentation. If it gets too distracting trying to keep up with all the faces in that little "filmstrip" gallery, try drawing a smiley face on a post-it note and sticking it up next to the camera lens. This little guy can represent your audience; looking at him will give the illusion of eye contact with everyone.
Before your meeting, start up a test meeting to check your camera image and audio levels. Use the audio controls next to the "microphone" icon to hear a sample sound and verify it's at the level you want, and arriving at the correct speakers or headphones. Record a bit of your own voice and play it back to make sure you'll be heard well by others. This way, you can avoid that awkward scene at the start of the meeting where everyone has to figure out their settings before moving on to business.
You're also able to record to your desktop, so you can use this feature to test not only your camera and microphone but also the "share" feature. Do a run through of your presentation with no audience, record it and play it back to make sure everything came through okay. Even if you’re used to talking in front of an audience, it can still feel strange delivering a presentation into a camera, so spend some time getting comfortable with the experience.
Don't...
Unfortunately, not everyone out there likes to play nice, and the last thing you need is to have your meeting disrupted by a Zoombombing or similar unpleasantness. Take a moment to secure your meetings with one or more safeguards:
- set a passcode to slow down intruders. If you don't want to make your guests type in a code, use the option to "embed passcode in meeting link." If nothing else, the added length of the URL will make it a lot harder for troublemakers to guess the address.
- enable a waiting room. If you know who you want to let in and who you don't, this is a great way to exercise control.
- lock the meeting once your invitees have arrived. If you know you've got everyone on board that you want, go to "Host Tools" and choose "Lock the meeting." No one's getting in after that.
- think about whether you want or need your guests to do things like show their camera image, use their mics or share content, and disable whichever of those powers they don't need.
- avoid advertising your event on social media. Bad actors scan posts all day looking for a party to crash. Don't let it be yours.
There's lots more about all of this in the Zoom Meetings Security Guidelines document, but trust us; any security you add to your meetings is absolutely worth the effort.
It's great that Zoom lets you record your meetings to your host device or to the Cloud, but be sure to always let your guests know when that's happening. Everyone deserves to be informed whenever their image or the things they say are being captured, and in the case of class recordings where students are seen and heard, that can be especially true. A little red light will flash whenever a recording is in progress, but it's still common courtesy to give your folks a heads-up.
Similarly, if you opt to use Zoom's AI Companion feature to generate Meeting Summaries, let your guests know when that's happening, as well.
There's no shortage of apps out there offering to leverage artificial intelligence to record your Zoom meetings and take detailed notes so you don't have to. Avoid all of them; most are invasive and self-propagating nuisances as well as potential threats to the university's data security. We block them wherever we can, but new ones keep cropping up all the time. You can help us greatly by steering clear of them.
Instead, you should take advantage of Zoom's native AI notetaking offering, the "Meetings Summary" feature in AI Companion. It's turned off by default, but anyone with a VCU Zoom account can turn it on for their own use as desired. The AI Companion page has more information on how to make this happen.
Summaries can be delivered straight to your email inbox as soon as they're ready. Just be sure to let your guests know when you're using Companion in a meeting.
This one seems like a no-brainer, but you'd be surprised. The convenience of the Zoom Mobile App means you're not necessarily confined to a laptop or PC to participate in meetings, but it's entirely fair to have some times when you're just plain unavailable to meet, and that includes times when you're behind the wheel. Besides being unsafe -- and depending on where you live, illegal -- it's also alarming to your fellow meeting participants who very much do not want to see you driving during a conference.
Zoom provides documentation for joining meetings in "safe driving mode" if you want to give that a try. Also note that every meeting invitation will include a telephone number to join as an audio-only participant, so it might be safest to join that way and treat it as a hands-free call. Just be sure to join before pulling out onto the road.
And Remember...
It's important to always adhere to university guidelines whenever using VCU accounts, devices, spaces or network resources. These guidelines include but are not limited to VCU's published policies on:
For a more comprehensive list, visit the page devoted to VCU's Technology Policies, Guidelines and Standards.