Kaltura Video Editing Guide
Kaltura provides an easy-to-use video editing application for simple tasks like setting a new start or end point, or removing unwanted content from the body of your video.
Launch the Editor and Select a Video
1. Log into your Kaltura account at go.vcu.edu/video with your eID and VCU password.
2. Navigate to “My Media” to see a list of all the videos you own.
3. Click on the pencil icon beside the video you want to edit.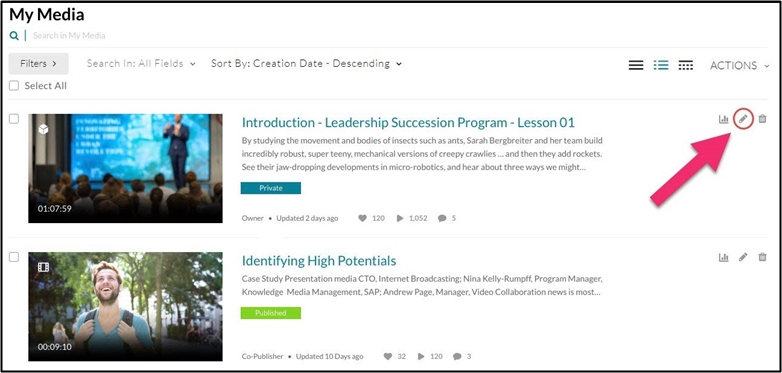
4. Click the Launch Editor button.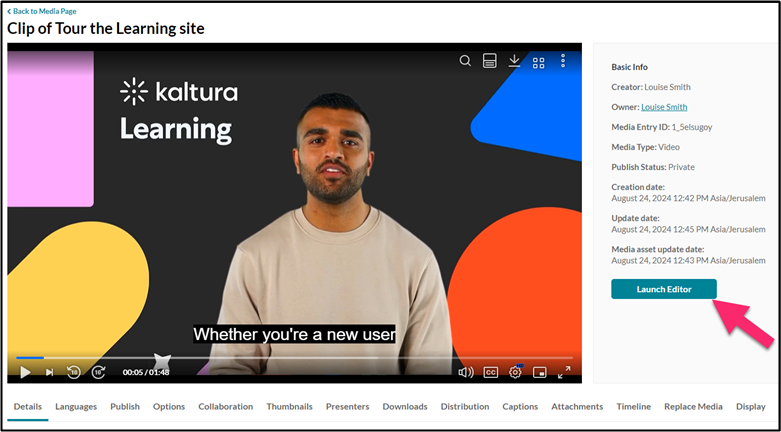
How to Trim the End of Your Video
In the Editor window, play the recording. Note how the real-time marker moves across the timeline in the bottom panel as the video plays. This marker shows where you are at any given point in the video, and the time-code indicator just below the playback window shows the exact time.
Once you get to the frame you want to set as the new start or end point for your video, pause the video. Then click the set in/set out icons to select the beginning and end of the range.

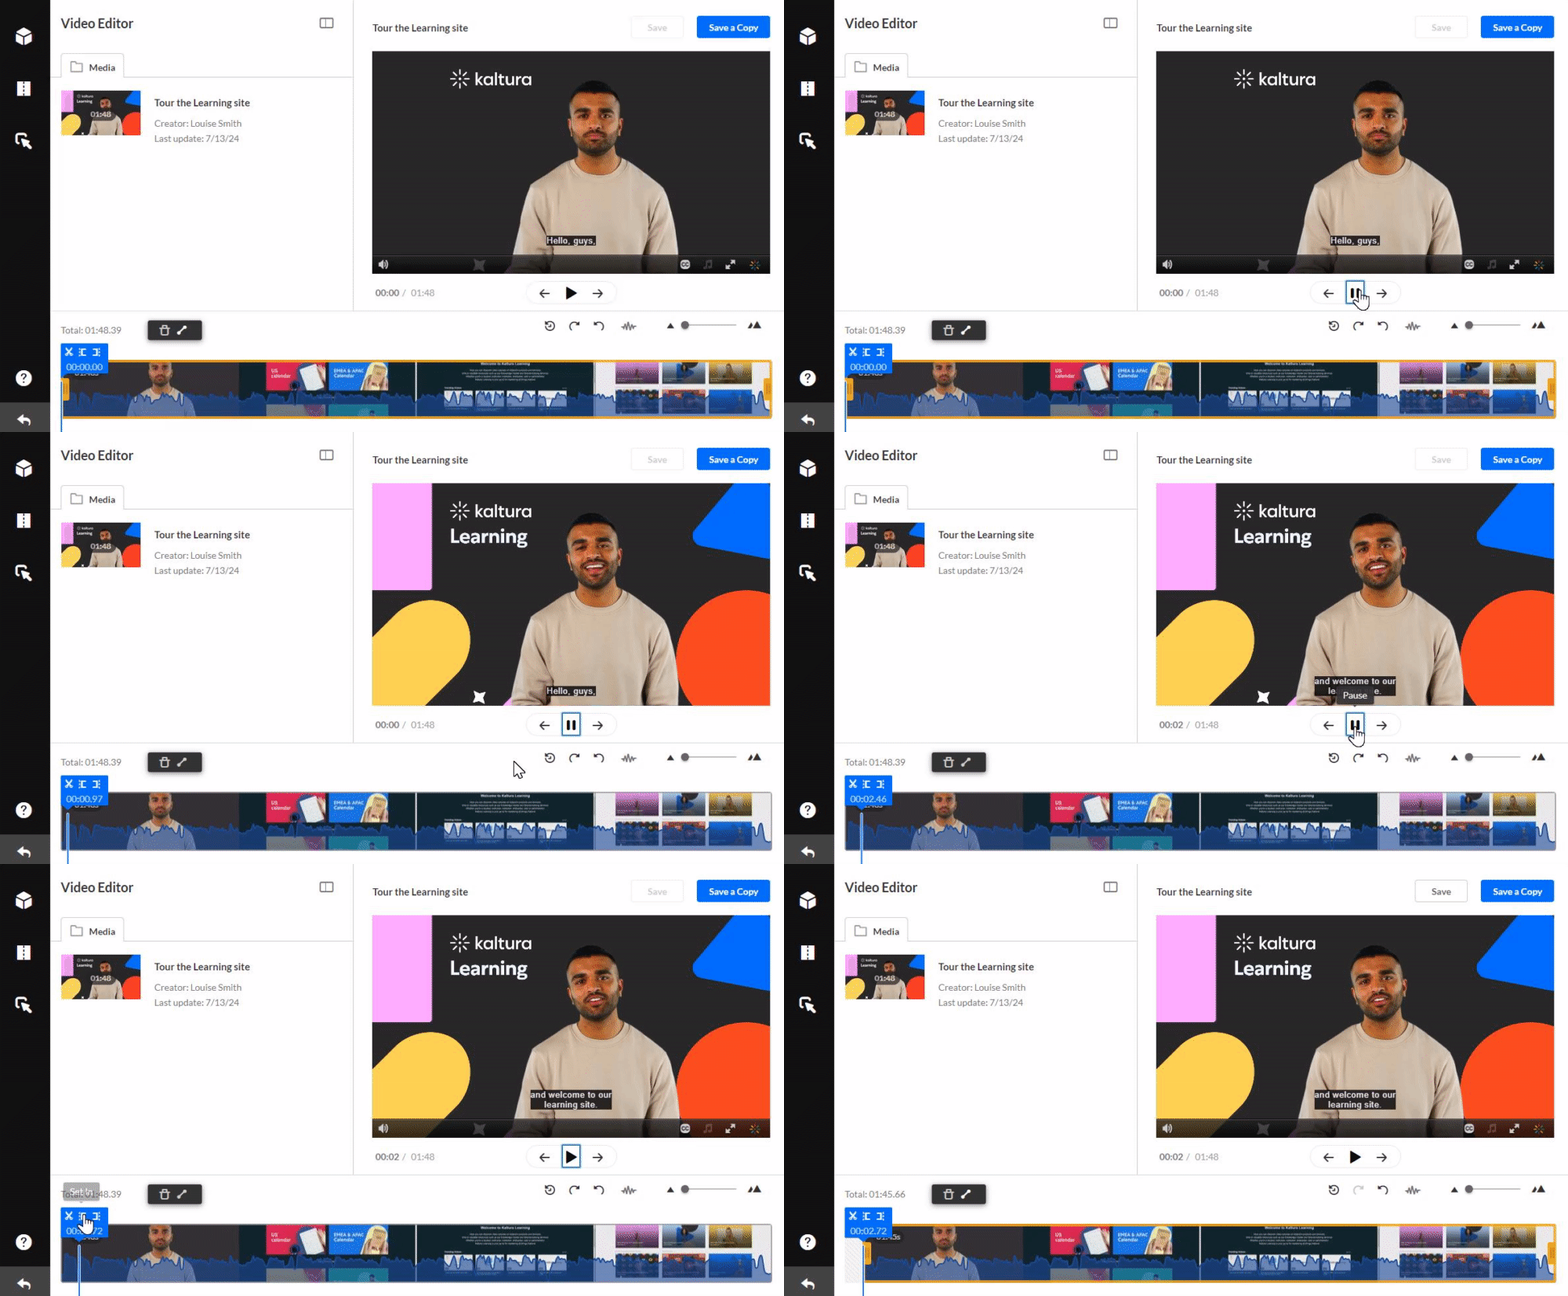
Or, if you prefer, grab the orange "handlebars" at either end of the timeline and drag them to the real-time marker.
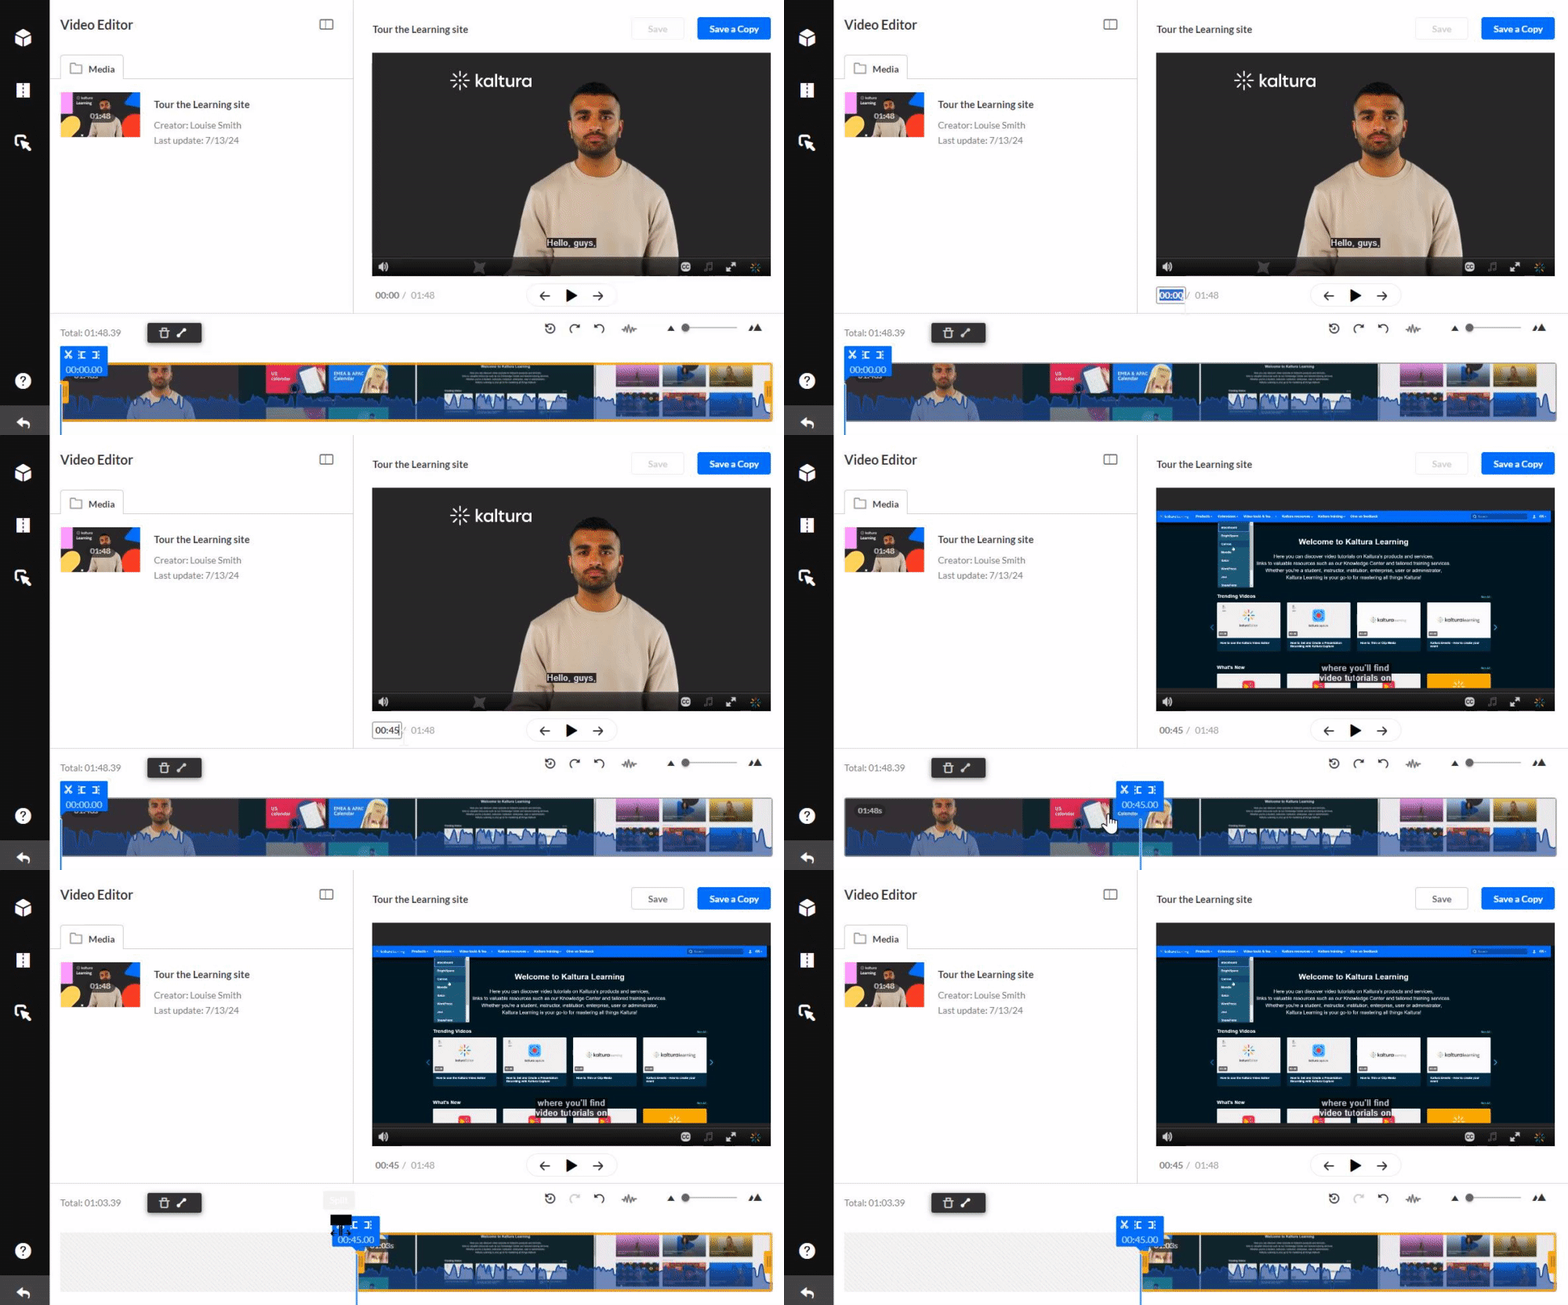
Once you're happy with the start and end times, preview your edits by clicking the play button again, and adjust the timing as needed.
If you want to replace your original recording with the newly edited version, click Save. Keep in mind this will alter the original media permanently and any deleted segments are gone for good. You’ll see a confirmation message asking if you’re sure this is what you want.
As an alternative, you can choose to “Save A Copy.” This will create a second, edited version of the video while preserving the original. Keep in mind that if your original file was linked to a Canvas course page, you’ll need to redirect that link to this new, edited version.
Once you’re done, you can go back to My Media to confirm the clip has been created.
How To Remove Segments From Inside A Video (via “Chop and Splice”)
Sometimes there may be content you want to remove from the body of a video, instead of from the start or end. Kaltura makes this possible via Chopping and Splicing.
Chopping cuts and removes a section in the middle of a video. Splicing joins the remaining sections together, and Kaltura does this automatically, so you don't need to move the cut segments yourself. Here’s how it’s done:
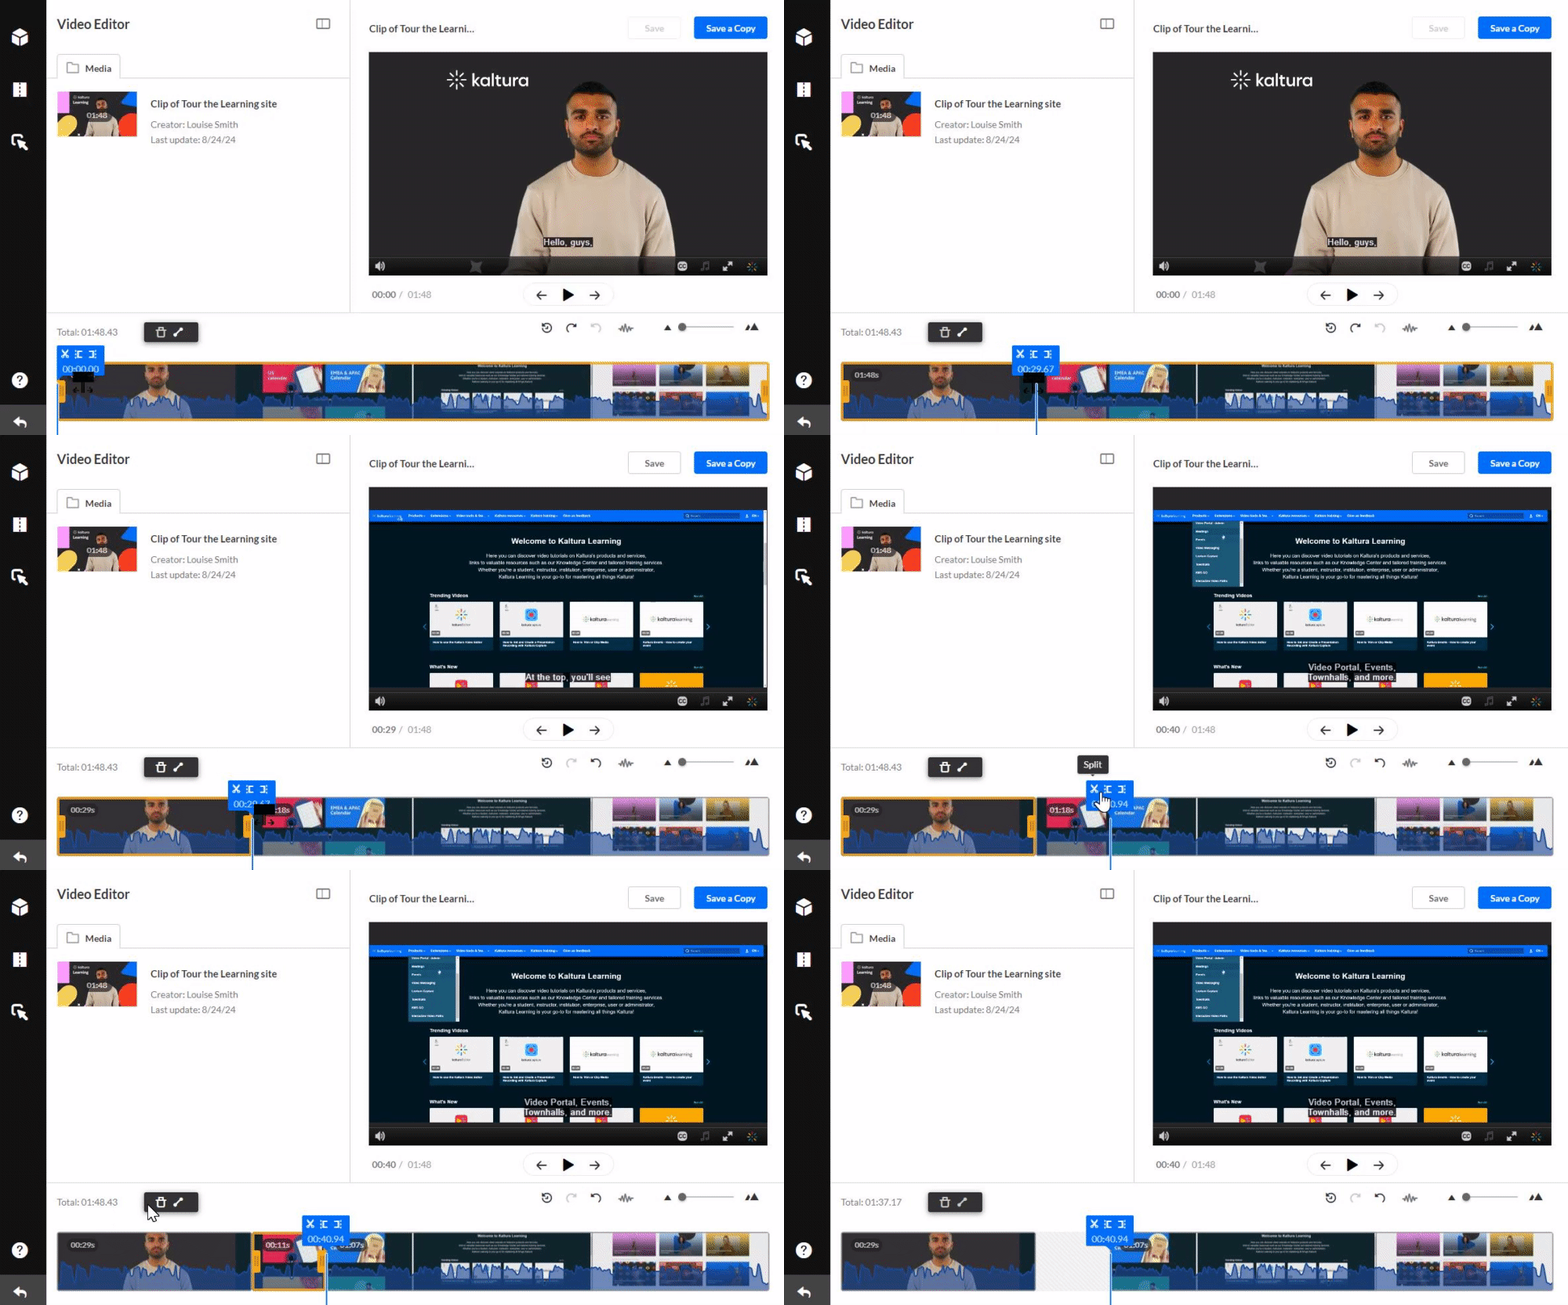
1. In the Kaltura Editor, click the timeline and drag the real-time marker to the start of the segment you want to remove.
2. Click the scissors icon to split the video. 
3. Drag the real-time marker to where you want your cut section to end and click the scissors icon again.
4. The above actions will create a subsection in your video. (This section should have a yellow border around it. If it doesn’t, click on it). Either click the trash icon or press the delete key to remove it.
The section disappears. Kaltura automatically splices the remaining segments, so you don't need to drag them together on the timeline.
Using Fade Effects To Blend Edited Footage
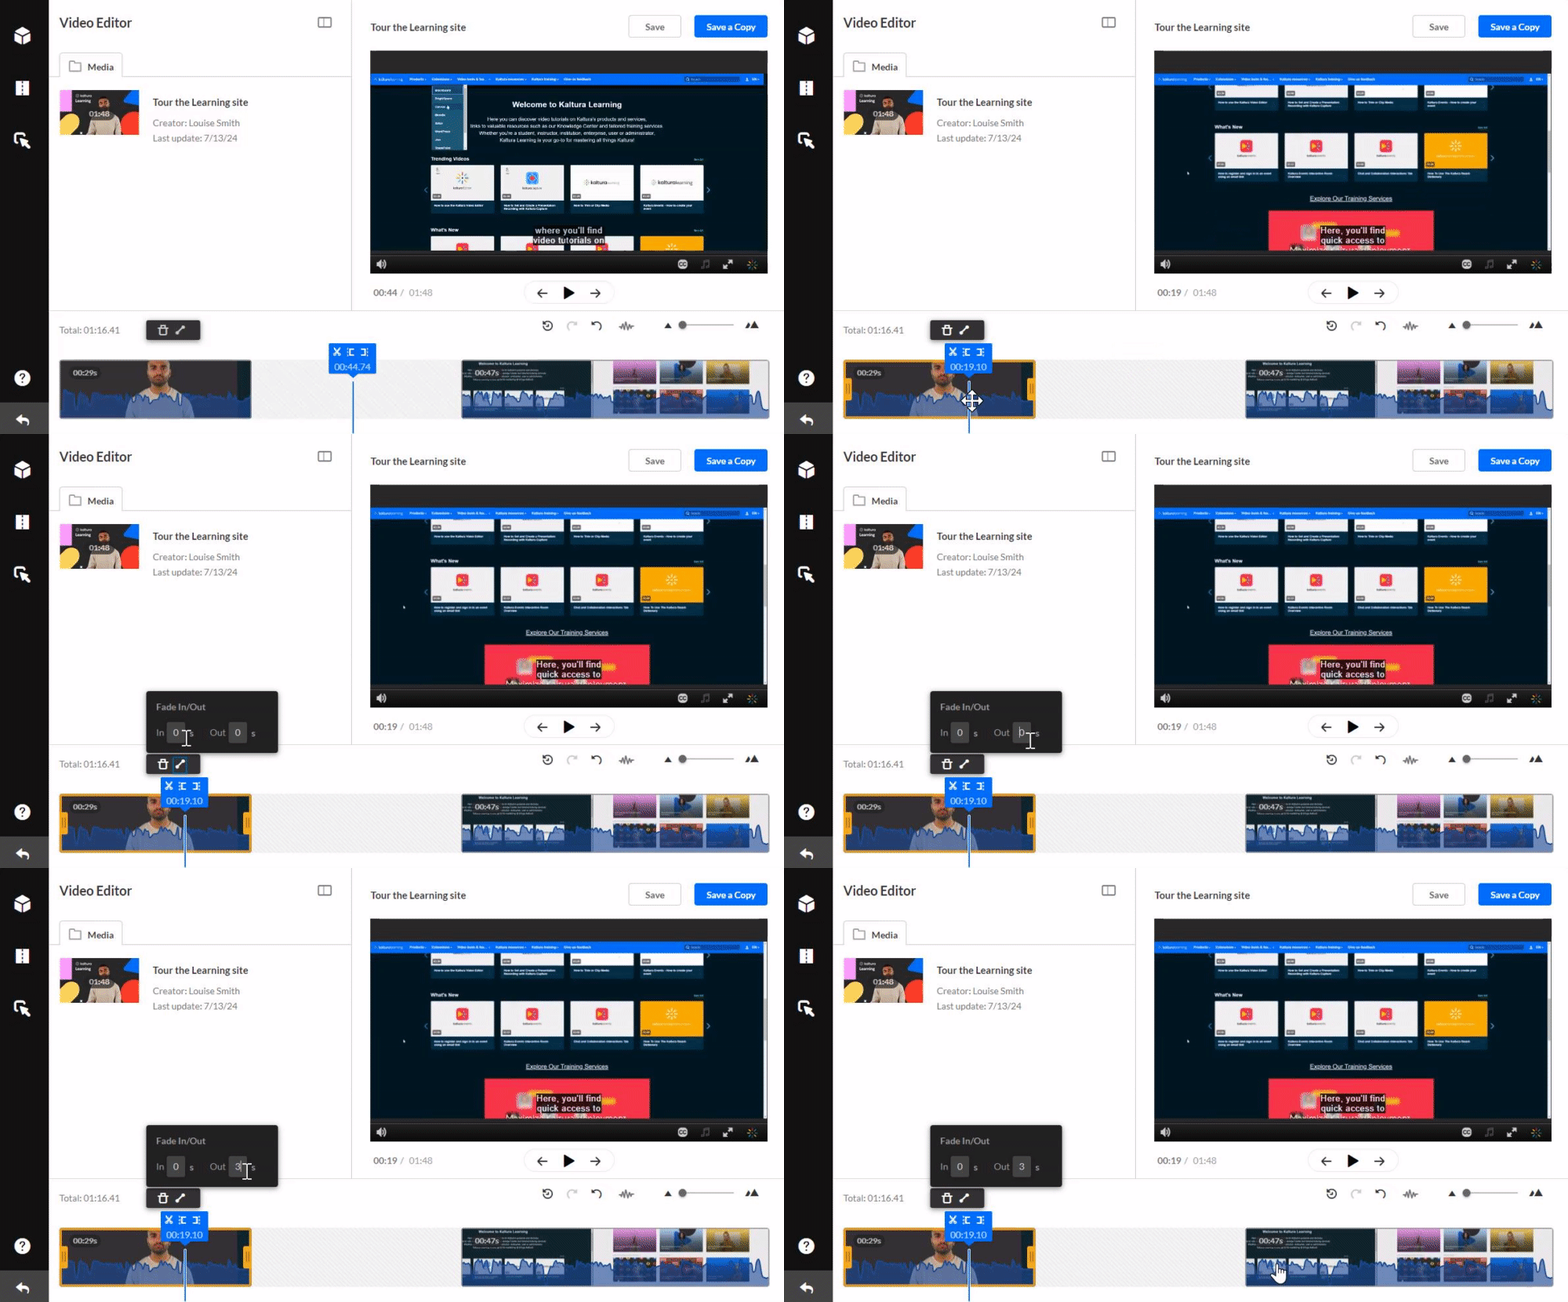
The removed footage will not leave a gap on playback, but viewers may see an abrupt “jump” where the cut was made. To smooth this out, you can add a “fade out” to the end of one segment and a “fade in” to the front of the next one.
1. Click on the segment that you want to apply a fade effect to.
2. Click the fade in / out icon and enter the desired duration in seconds. 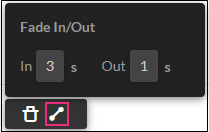
3. Click anywhere outside the window or press enter to confirm your changes and close the fade in / out window.
Exit the Editor
When you have finished editing, click the exit arrow in the bottom left corner to close the editor.
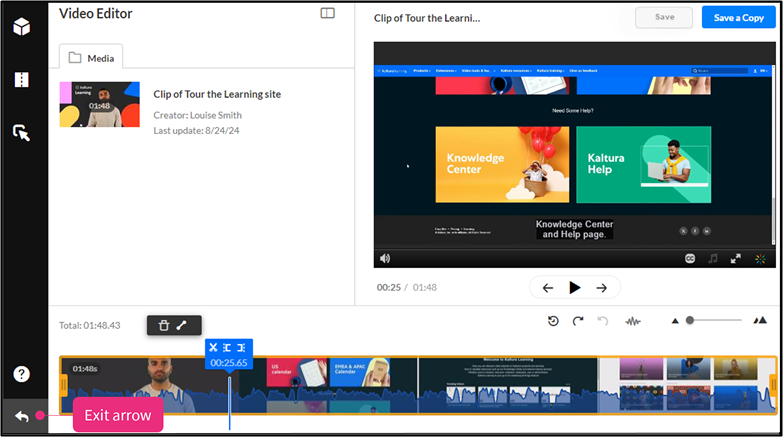
If you ever want to start over during editing, just click the exit arrow and then return.